Set Piece/DST
 |
 |
Set Pieces are rare, naturally spawned structures and items in all game modes. They were introduced in the Doorway to Adventure update. Players can usually find valuable Items in the set piece. However, some set pieces function as a trap, forcing players to either bear the risk or disable the trap if possible. On some occasions, the player will have to retrieve the items from the set piece in order to escape the danger.
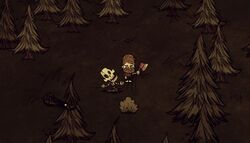
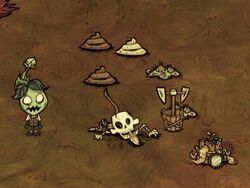
Players may also find Skeletons lying around, oftentimes with items surrounding them. These are called Failed Survivors. Unlike other Set Pieces, they are never traps. A key way to tell the difference is that Failed Survivors lack structures, floors, walls, etc. Be aware that it is possible to find skeleton and set pieces combined. The spawn frequency of Failed Survivors can be adjusted in the World Customization screen.
- Note: The names of most set pieces are unofficial; they are nicknames invented by the Don't Starve community.
Spoil Food Trap

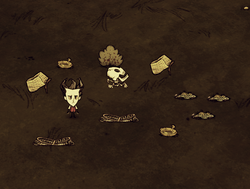
The Spoil Food trap is usually found in Swamp biome. The set piece contains some Rots, a Skeleton, a Pig Head, and a Chest. If the player opens a Chest from the set piece, all food in the player's inventory will spoil. However, the player can avoid this by dropping all perishable items away from the trap and then opening the Chest, though this method may be problematic if there are Pigs or any other kind of Mob nearby that might eat the dropped food.
Inside the Chest, there will be more Rots, and multiple Blueprints.
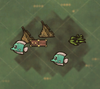
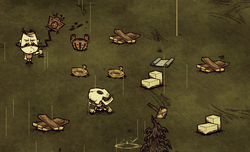
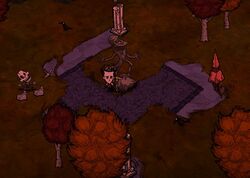
Disused Beefalo Pen Trap

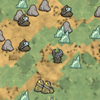
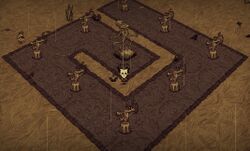
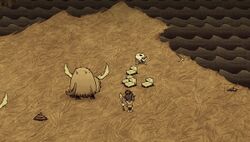
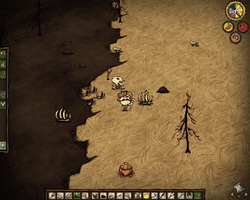
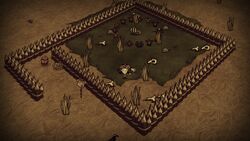
The disused Beefalo pen trap is usually located in a Savanna Biome and consists of a long Wood Wall fencing that curls around a squarish piece of land. Inside the fence are several Bones and Beefalo Wool, conveying the idea of an old Beefalo pen. There is a Chest at the entrance, which contains 1 Fire Staff, 4 Gunpowder, and 4 Logs.
Everything inside the fence can be taken. However, the Chest is trapped and will catch on fire when it's opened. The fire will cause the Gunpowder to explode, light the entire wooden fencing, and destroy the contents of the Chest. A way to prevent burning is to Hammer the nearby wood walls until they're destroyed. You can also extinguish the fire when the chest explodes. The fence can also manually be set on fire using Torch - providing a large amount of Ashes. This will not set the Chest on fire - but will also not disable its explosive trap. Hammering the Chest itself can trigger the trap.
All items can be taken from the Chest before the trap explodes, provided the player is fast enough. There is also a 34% chance for it to be a dud.
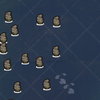
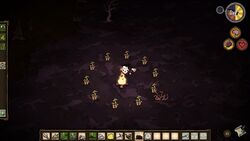
Fire Staff Trap

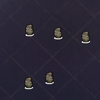
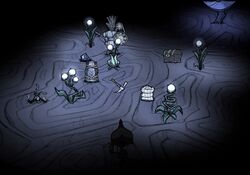
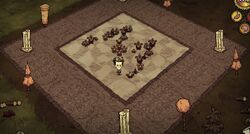
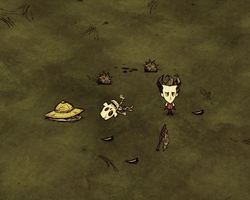
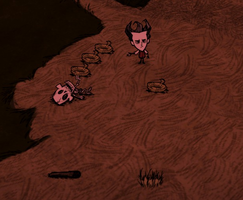
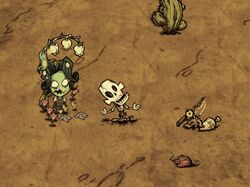
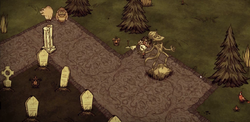
This set piece consists of a Fire Staff surrounded by sleeping Red Hounds. Once the staff is retrieved, all Red Hounds will awake, causing the player to lose a large amount of sanity, and it will begin to rain.
The most efficient way to deal with this is to kill the Red Hounds before retrieving the staff, as each can be fought individually without fear of waking the others.
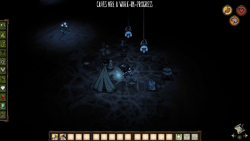
In Don't Starve Together, this set piece can also spawn in the Caves. This (and the one below) is the only way to have hounds legitimately in the Caves. This setpiece can be used with the Bee Queen Crown and pushing the sleeping Hounds close together to passively regenerate close to 200 sanity/minute.
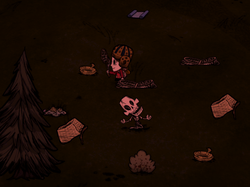
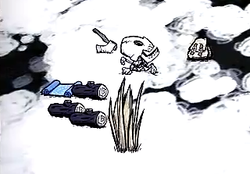
Ice Staff Trap

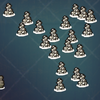
An Ice Staff trap, similar to the Fire Staff trap, is an Ice Staff surrounded by five sleeping Blue Hounds. Once the staff is retrieved, all five Blue Hounds will awake, causing the player to lose a large amount of sanity, and it will begin to rain.
The most efficient way to deal with this is to kill the Blue Hounds before retrieving the staff, as they can be fought individually without fear of waking the others.
In Don't Starve Together, this setpiece can also spawn in the Caves. This (and the one above) is the only way to have hounds legitimately in the Caves. This setpiece can be used with the Bee Queen Crown and pushing the sleeping Hounds close together to passively regenerate close to 200 sanity/minute.
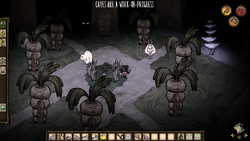
Spider Trap

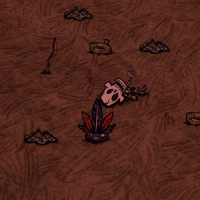
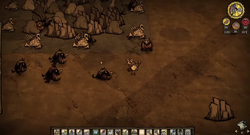
There is a Spider Warrior sleeping on a Carpeted Flooring, close to a little Grass and Twigs farm. There are also Bones and a Pig Head around the Carpeted Flooring. If the Spider Warrior is attacked, three more Warriors will spawn around the player. Sometimes there are multiple sleeping Spider Warriors. In Don't Starve Together, some of the twigs are replaced by Twiggy trees.
One way to deal with the Spider Warrior without triggering the trap is to set down a Trap near it, then stand next to the spider until it awakens. When it does, it's better not to attack it, but instead run past the trap and ensure that the Warrior will trigger it. Since spiders die when trapped, and trapping a creature does not count as attacking/killing it, the other three Warriors won't spawn. This method makes this trap a viable starter base if discovered in early game, as all characters can weave a trap without a Science Machine and the farm provides valuable resources, if in a small quantity.
Imprisoned Pig

The Pig Trap set piece consists of Basalt on three sides, and Obelisks on the other, with a Pig House in the middle. The player has to be insane to get through Obelisks. To do this, the player can wear Bone Helm, Nightmare Amulet, or eat Green Caps to lower his sanity.
Players can use the Imprisoned Pig Set Piece in which Basalt spawns to trap any kind of mob, even giants, and hold them prisoner there without fearing their escape. An easy way to trap them is craft a Telelocator Focus inside the "prison" and then use the Telelocator Staff on the desired mob.
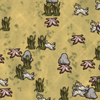
Homeless Pig/Merm


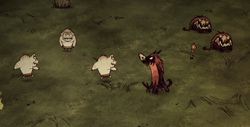
In any Biome, it's possible to find Pigs or Merms in groups of 2-4 that behave normally, but have no homes to which they can return when they would usually sleep. Sometimes both Pigs and Merms spawn in the same location and will begin fighting when the player enters the area. Wandering Merms can pose a threat to an unprepared player, and wandering Pigs can turn into wandering Werepigs during a Full Moon. However, a quick player can take advantage if they spawn together to grab their respective loot during the battle.
Killer Bee Hayfield

A Killer Bee Hayfield is a field of Grass Tufts with 3 Killer Bee Hives concealed within. It can be difficult to handle all the killer bees from 3 Hives. To handle this, the player may plant a Lureplant nearby, and then destroy the Bee Hives and Lureplant once the area has been cleared of Killer Bees. Wendy may also clear this easily by having Abigail attack and destroy the Bees and Hives.
This Set Piece also has a version including a group of Guardian Pigs.
Note that The Killer Bee Hives are controlled by the settings. If one has them set to "none," this set piece will simply be a dense field of harmless grass.
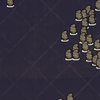
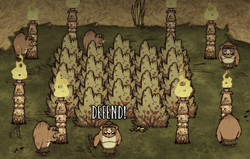
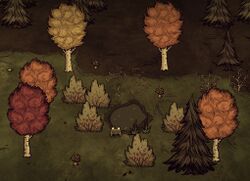
Living Forest

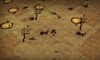
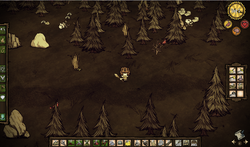
A bunch of Evergreens with a group of Treeguards roaming around or sleeping, often more than five. The Treeguards are not aggressive unless the player attacks or chops the trees nearby.
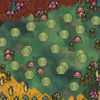
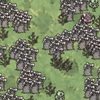
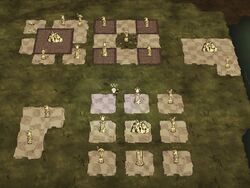
Pigguard Berry Fields
The large Guardian Pig Berry Field.
The smaller variant of the Guardian Pig Berry Field.
Grass Tufts variant.


This Set Piece has a large patch of Berry Bushes protected by a number of Guardian Pigs. It appears in Grasslands, Savanna, and Deciduous Forest Biomes. It contains eight Pig Torches and 20 Berry Bushes. There is also a smaller variant containing only one Pig Torch and 22 Berry Bushes. The Berry Bushes may be replaced by Grass Tufts or Juicy Berry Bushes (Don't Starve Together only).
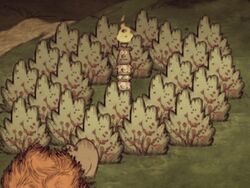
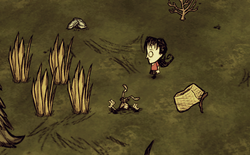
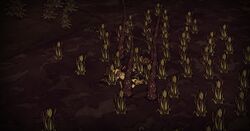
Reed Trap

This Set Piece is a field of Reeds that conceals a large number of Tentacles around and inside it. The player can attempt to collect the Reeds by wearing armor and carrying a Walking Cane, but it is very risky.
Using a kiting technique, it is possible to slowly and steadily kill all of the Tentacles one by one. It is a good idea to set up a permanent camp nearby, as during the clearing process, the player will get a large supply of Tentacle Spikes and Monster Meat.
Building several Pig Houses near the Reeds will result in a steady supply of Meat and Pig Skin, as well as gradually destroying the Tentacles. Although, any surviving Pigs will likely eat any meat before the player can get to it.
Alternatively, one can also use Spider Dens to get large amounts of Silk and Spider Glands. However, once the spiders take out the Tentacles, the player(s) will have to deal with a newly grown den, and potentially a Spider Queen.
Playing as or with a Wendy in DST can make clearing a reed trap much easier, as a level 3 Abigail can tank the hits of the tentacles while attacking. Since tentacles lock onto a target once they begin to attack, there's little to no risk of losing large amounts of health, and coming prepared with Spectral Cure-Alls can make the process extremely quick. Wurt can spot the Tentacles and use Merm Guards to fight for her, so she can clear all the Tentacles with ease.
Once cleared of Tentacles, the area is a steady supply of usually hard-to-come-by Reeds, making items such as Blow Darts much easier to acquire.
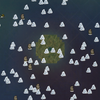
Queens' Gathering

A Queen's Gathering is a ring of Tier 3 Spider Dens with an additional den In the center, commonly found in a forest. There is a good chance for a Spider Queen to appear. An easy way to prevent this from happening is to simply burn down the forest.
There is another, even bigger version of this set piece, which contains multiple Tier 1 Spider Dens scattered around the area with Gold nuggets lying in various places. This variety is usually found in a rocky biome.
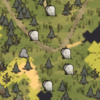
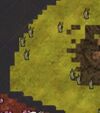
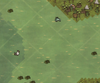
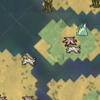
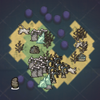
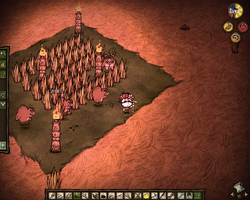
Tallfort
Tallfort.
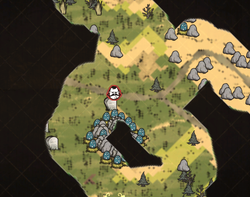
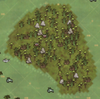
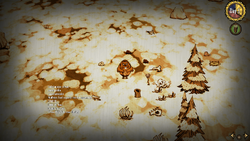
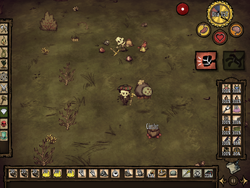
Tallfort seen on a Map.
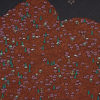
Emptied Tallfort.


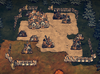
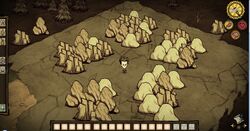
A Tallfort features a patch of rocky terrain with numerous Boulders, and Tallbird Nests. It is difficult for a player to deal with so many Tallbirds alone, due to their high damage and quick movement. One way to deal with these Tallbirds is using giants like Bearger or Deerclops, as they have strong AOE attacks. Killing Tallbirds will yield abundant food sources including Meats and Tallbird Eggs.
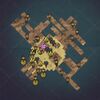
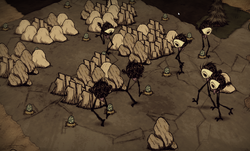
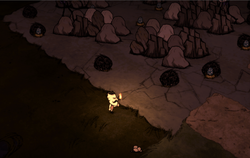
Hound Fortress
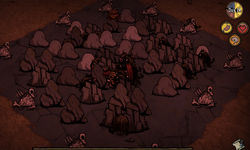
WX-78 inside the fort.
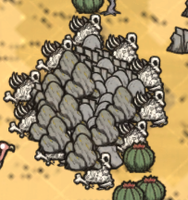
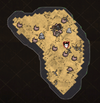
The Fort seen on the Map.


Found in the Desert biome, this set piece has a dense cluster of Boulders surrounded by Hound Mounds, with Rocky Turf underneath. The layout is very similar to the Tallfort set piece, having Hounds instead of Tallbirds.
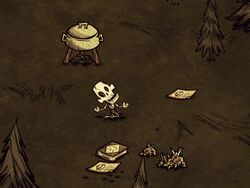
Crock Pot Camp

This set piece is a camp found in Adventure Mode. It's usually enclosed by both Hay and Wood Walls. It has Wooden Flooring and some Rocky Turf, a Crock Pot, and a Bee Box or an empty Birdcage nearby. Several Skeletons are within the camp.
Lightened Cave Camp
Cave Camp with Single, Double and Triple Light Flowers.

This camp has a Science Machine, an Ice Box, a Chest, a Lantern, a Fur Roll, and a Pickaxe. The Ice Box may be empty, or it may contain a random amount of Light Bulbs, Meat, Berries, and Batilisk Wings, if they haven't spoilt or rot by the time the player finds it. The Chest can contain a variety of items, including Silk, Flint, Slurtle Slime, Healing Salves, Rot, Logs, Broken Shells, and a Fur Roll.
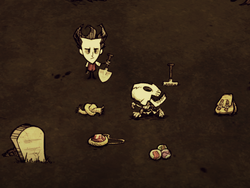
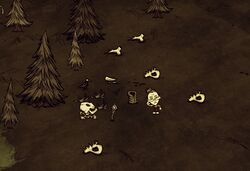
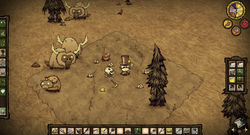
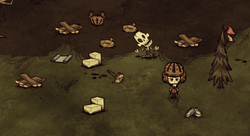
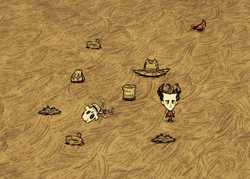
Miner's Camp

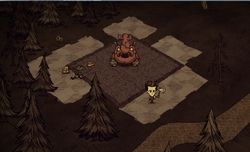
This set piece consists of a Skeleton, Miner Hat, and Opulent Pickaxe beside a small base camp. Inside the base, there is a Shadow Manipulator and a Tent. Other objects like Berry Bushes, Bee Boxes, Stone Walls, Wooden Flooring, and Crock Pots may also be nearby.
If one manages to find these when starting in a world, this is a rather excellent place to take shelter, as it has a lot of things to keep a player alive, and can be "upgraded" to an even better base.
Ruins Camp Trap

Found in the Ruins, this set piece contains a Chest, a Crock Pot, an Ice Box, a Tent, a Science Machine, a Prestihatitator, and a Skeleton. The visitor should pay close attention once approached, as the camp has webbing covering the ground; Dangling Depth Dwellers will descend, making it difficult for players to utilize this set piece safely.
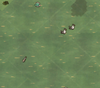
Crop Circles

This set piece consists of Grass Turf mixed with a pattern of spots of Savanna Turf. This set piece is likely a bug, as it's extremely rare and contains nothing besides turfs.
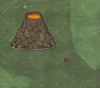
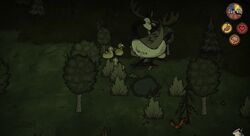
Moose/Goose Nest
Moose/Goose Nest in Autumn.
Nest in Spring, the egg has hatched.
Three Nests next to each other. The rest of the preset is absent.
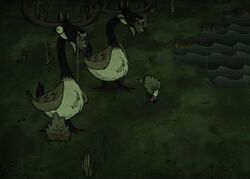
Two Moose/Gooses that have spawned from the three nests in the previous picture.
Another nest, but with Evergreens instead of Birchnut Trees.


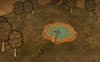
In the Grassland Biome, it is possible to find a various amount of set pieces with some Berry Bushes, Carrots, Birchnut Trees, and a Pond. On the ground are some twigs aligned in a circle, these twigs can sometimes spawn without the other parts of the set piece such as the pond and in even rarer cases the nest will spawn by itself. During spring, the Moose/Goose will spawn there and make a nest in the center of the circle, and lay its egg in it. Despite the resources being quickly available, it is not advised to set up a base near this location.
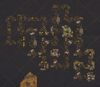
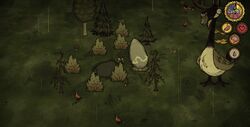
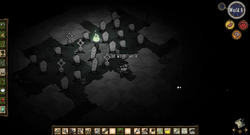
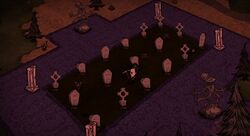
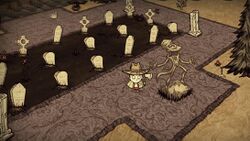
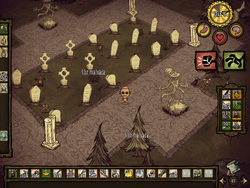
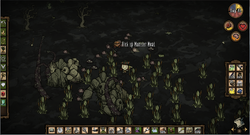
Maxwell's Cemetery


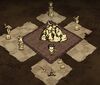
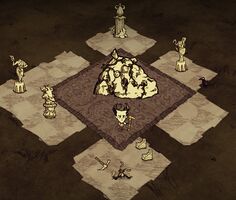
Maxwell's Cemetery contains Graves, Marble Pillars, Evil Flowers, Carpeted Flooring, two Maxwell Statues, and a Shovel. The Graves that populate the Cemetery are the same as those found within a Graveyard (i.e. they drop the same items when destroyed, and can spawn Ghosts).
Each Grave has a different name on it when examined, which correspond with the names of the members of the development team at Klei Entertainment, therefore this set piece is also known as Dev Graveyard.
Every grave dug within this set piece can spawn a Ghost. Digging the last grave will spawn a group of ghosts (one from each grave). For every full moon, the graveyard will also spawn a lot of ghosts.
This set piece can also spawn in the Caves. Digging up the graves is one of the few, and non-renewable ways of spawning Ghosts in the Caves. Ghosts do not spawn during a full moon as the DST caves do not feature a Mooncycle.
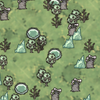
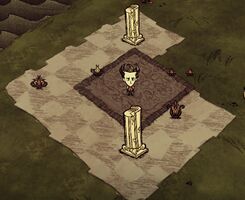
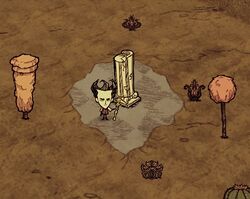
Chess Set Piece
Carpeted Island.
Lonely Column

Clockwork Knights and Fighter's Skeleton.
M for Maxwell.
Swirling Your Mind.
Rook with Backpack.


There are set pieces based on a small patch of a Chess biome. They are usually filled with Evil Flowers, Marble Trees, Marble Pillars, Maxwell Statues, Harp Statues, Gears, Clockwork Monsters, and sometimes a Spear. These Set Pieces make Marble and Gears more abundant on the surface.
They can sometimes be found partly covered by the surrounding terrain, with only a few flowers, a statue or trees, or a few Clockwork Monsters present. Other times, the set piece is more elaborate. For example, the player may find one with a Maxwell Statue in the center surrounded by Marble Trees.
Marble Sculptures Set Piece
Full Marble Sculptures Set Piece.
5 variants of Marble Sculptures Set Piece.
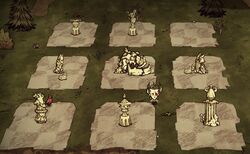
Grid Style Marble Sculptures Set Piece.


There are variants of the Reign of Giants Chess Set Pieces, introduced in A New Reign. In every world, there is always a complete Marble Sculptures Set Piece, that includes all types of Marble Sculptures and Marble Statues, along with a Skeleton, two Marbles and a Pickaxe. While the Statues can be mined to obtain Sketches, the Marble Sculptures can be repaired with Suspicious Marble and turned into Shadow Pieces during New Moon or Clockwork Monsters during Full Moon.
There are another 4 variants of Marble Sculptures Set Pieces that can possibly be found in the world. Some of them only contains 1 or 2 types of Marble Sculptures. No matter how many Marble Sculptures there are, there will always be the same amount of Suspicious Marbles in the world so all the Marlble Sculptures can be repaired.
Bath Bombed Hot Spring

Bath Bombed Hot Spring Set Piece.
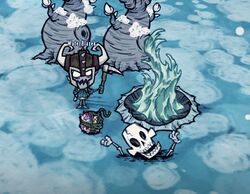
Bath Bombed Hot Spring Set Piece after Full Moon.


This set piece is always present in Lunar Baths. It contains a Hot Spring with a Bath Bomb already tossed in it, a Bath Bomb on the ground, a Skeleton and two Lune Trees.
If the set piece is discovered after the Full Moon the Hot Spring will be glassed.
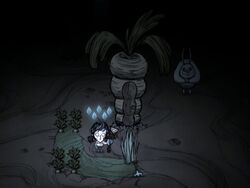
Moon Tree Hidden Axe

This set piece features a square made of Lune Trees with a Moon Glass Axe in the middle. The axe is rather difficult to see, so the player must walk to the center and hold spacebar until they pick up the axe.
This set piece can generate multiple times on the Lunar Island.
Depths Worms Trap

This set pieces contains 10 Lesser Glow Berries with 3 Depths Worms. Killing Ancient Fuelweaver will respawn these Depths Worms.
One way to differenciate Lesser Glow Berry and Depths Worm is, when the world is not wet, check the berry to see if it is wet or not. If it is wet when the world is not, it is a Depths Worms in disguise. If the world is wet, the player can use a Torch to see if he can light the plant or not (hover to check, no need to actually burn the plant). A Depth Worm is not flammable.
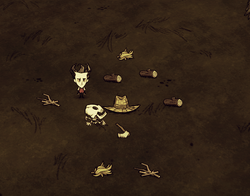
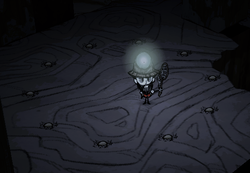
Merm and Pigman Skeletons

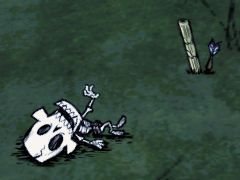
Pig and Merm Skeletons can be found only in Caves in two copies. They always appear along with several Silks, under a beam of light. The backstory of these skeletons is shown in the short film Tales From the Constant: Falling.
Boat Traps


Boat Traps can be found in the Swell Ocean with 61 health surrounded by four Sea Stacks. Up to two Boat Traps can spawn per world. They always contain one Skeleton, Sea Fishing Rod, Tackle Box and a Chest. There may also be a Snow Day Lure, Twigs, Driftwood Oar, Oar, Fish Food, Cut Grass, or Spoiled Fish dropped on the Boat. There is a chance to find a broken down version of the mast on the deck, that has a unique sinking animation if the boat is destroyed.
Once you open the chest, there is a 10 % chance that nothing will happen, and a 90% chance that one of 3 trap effects will trigger, with equal chance:
- A ghost will appear from the skeleton on board and attack you, and your character will lose 50
 . This effect can trigger successfully only if the skeleton is intact.
 - The boat's health
 will be instantly reduced to 0 and it'll start to sink.
 - A Pirate Raid will appear.
In the chest you can find:
| Item | Count | Durability | Chance |
|---|---|---|---|
| x1 | 43 - 82% | 33% | |
| x2-5 | - | 33% | |
| x2-5 | - | 66% | |
| x1-3 | - | 66% | |
| x1 | - | 33% | |
| x1 | 43 - 82% | 66% | |
| x1-3 | - | 66% | |
| x1 | 40 - 80% | 66% | |
| x1 | 40 - 80% | 66% |
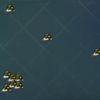
Ocean Treasure Monument

Up to two Ocean Monuments can be found anywhere in the Ocean. This set piece consist of a ring of eight Sea Stacks surrounding a submerged Sunken Chest that can be recovered with a Pinchin' Winch.
The Sunken Chest has a different loot pool from the one spawned by Message in a Bottle, holding high tier Ruins gear and Gems.
The chest ![]() can contain:
can contain:
| Item | Count | Durability | Chance |
|---|---|---|---|
| x5-8 | - | 100% | |
| x1 | 80 - 100% ( 90 - 100% ( |
85% | |
| x1 | 80 - 100% | 85% | |
| x1 | 80 - 100% ( |
85% | |
| x1 | 80 - 100% | 85% | |
| x2-3 | - | 100% | |
| x2-3 | - | 100% | |
| x2-3 | - | 66% | |
| x1 | - | 50% | |
| x1 | - | 10% |
If two Ocean Monuments appear in a world, the chest in one of them will have only one slot, and thus contain only one random drop from the list above.
Other Set Pieces
Lumberjack Skeleton.
Beekeeper Skeleton.
Gravedigger Skeleton.
Trapper Skeleton.
Trapper Skeleton with a Blueprint for a Bird Trap.
Refiner and Miner Skeleton.
Refiner Skeleton with Cut Stones.
Refiner Skeleton with Ropes.
Skeleton with a Blow Dart.
Skeleton with a Bush Hat.
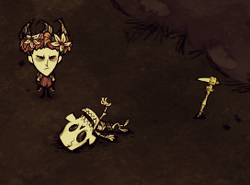
Skeleton with a Walking Cane.
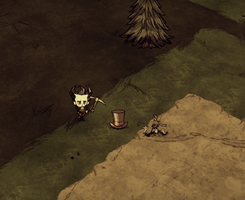
Skeleton with a Top Hat.
Tentacle trap and Hound attack boon.
Feather Hat, Fishing Rod, and some Rope.
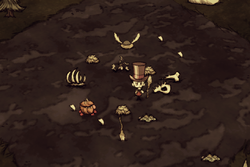
Puffy Vest, Beard Hairs, Ice Staff, and some Bones.
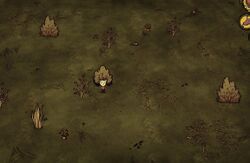
Red Hound aftermath.
Blue Hound aftermath.
Set Piece in "King of Winter" in Adventure Mode.
Set Piece in "A Cold Reception" in Adventure Mode.
Maxwell's World 6 Cemetery.
Green Mushroom ring.
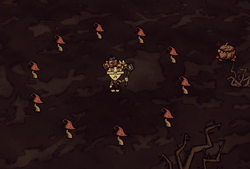
Red Mushroom ring.
Red Mushroom ring found in a Cave.
Miner's Camp with 4 Treeguards.
Circle of Rabbit Hutches with a Basic Farm and Pitchfork.
Skeleton with Miner's Hat and Gems.
Refined materials, Football Helmet, Hammer, and Bird Cage Blueprint.
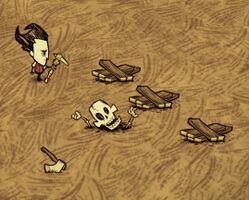
Skeleton with boards and an axe
Skeleton with Crock Pot and Cookbook
Skeleton with fishing tools
Skeleton with farming tools


 Gallery

Fire Staff Trap
Pigs fighting Red Hounds at the staff trap.
Wigfrid near a Hound Fortress.
Maxwell's Cemetery
Maxwell's Cemetery
Maxwell's Cemetery
Another picture of Maxwell's Cemetery.
Lost Statue.
The player being attacked.
Rock Lobsters brought to kill the Tentacles.
Sleeping Tallbirds in Tallfort.
Beefalo Pen Set Piece overlapping with the Ring Thing.


| Biomes | |
| Surface | |
| Caves | |
| Ruins | |
| Water Biomes | |
| Lunar Biomes | |
| Set Piece | |
| Other | Bridge • Map • Road (Trail) • Turfs • Abyss (Interiors |